Experiment Screen
Use the Experiment Screen to collect, display, and analyze data.
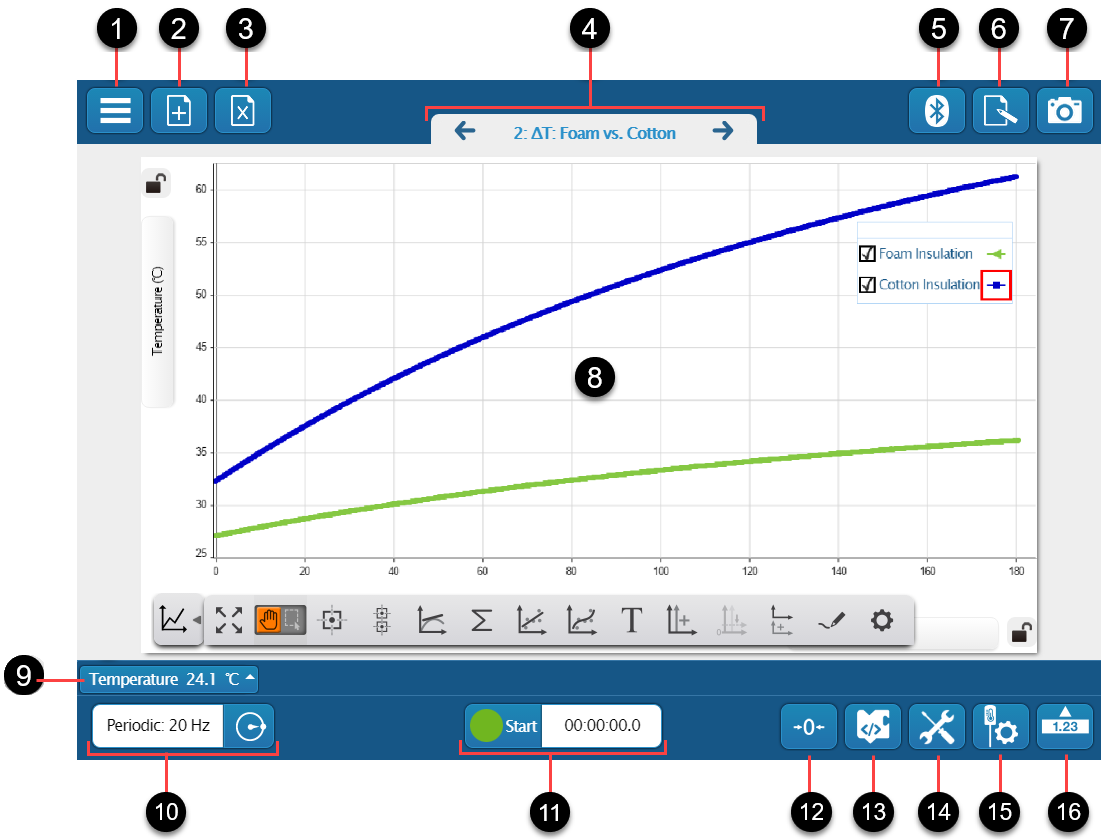
- Main Menu

- Start New Experiment: Return to the Welcome Screen.
- Experiments: Open a PASCO Experiment.
- Open: Open a previously saved experiment.
- Save or Save As: Save the current file to your computing device.
- Export Data: Export data as a CSV file.
- Preferences: Toggle certain global settings, such as analytics or auto-hiding runs during experiments.
- Shared Session: Start or join a Shared Session.
- Help: Open this help site in your web browser.
- About SPARKvue: View information about the installed version of SPARKvue, as well as contact information for technical support.
- Exit: Close SPARKvue.
-
New Page

Build a new experiment page after the one currently displayed on the screen.
-
Delete Page

Delete the currently displayed page.
-
Page Name and Number
Click to change the name of the current page, or to select a different page to display. Click the arrows to navigate between pages.
-
Wireless Devices

Connect a wireless sensor and set up remote data logging.
-
Journal

Create and edit the snapshot Journal. Print or export the Journal after making your edits.
-
Journal Snapshot

Take a snapshot of the current screen and add it to the Journal.
-
Experiment Page
Display and analyze experiment data in multiple ways such as a graph or table. Control various hardware such as signal generators and Smart Cart accessories.
-
Live Data Bar
See the live measurement reading for measurements currently selected in the experiment page. Click to zero, change the sign, calibrate, and configure the measurement properties.
-
Sampling Options
Displays the current sample rate or sampling mode. Click
 to configure the following:
- Sampling mode (Periodic or Manual)
- Sampling rate
- Start and stop conditions
-
Data Recording Controls
- Click to Start
 or Stop
  data collection. The clock displays the elapsed data collection time.
 - When using the Code tool without sensors connected, the Start button changes to Execute
 . Click to run the program in the Code tool.
- Click to Start
-
Zero Measurements

Click to zero all measurements of connected sensors.
Note
Not all sensors support zeroing measurements.
Tip
Use the Live Data Bar to zero measurements individually.
-
Code

Click to open the Code tool to create programs using Blockly.
-
Experiment Tools

- Manage Runs: Delete or rename a run.
- Manage Images: Delete and rename images taken with the Camera display.
- Calculated Data: Create calculations to transform data.
- Data Properties: Change the number format (such as the number of decimal places), change the default units, and apply one color to all runs.
-
Hardware Setup

Configure sensors and their measurements:
- Sensors: Turn on or off, zero, and change the sign.
- Measurement: Calibrate the measurement and access the Data Properties.
-
Live Data Bar Visibility

Click to show or hide the Live Data Bar.