Set up a timer using two photogates
Use this timer to measure the speed and acceleration of a cart.
Equipment setup
-
2× Photogates
Use one of the following setups:
- Wireless Smart Gate (PS-3225) with a Photogate Head (ME-9498A)
- Smart Gate (PS-2180), connected to a PASPORT interface, with a Photogate Head (ME-9498A)
- Two Photogate Heads (ME-9498A) connected to a digital interface
-
Cart and track
-
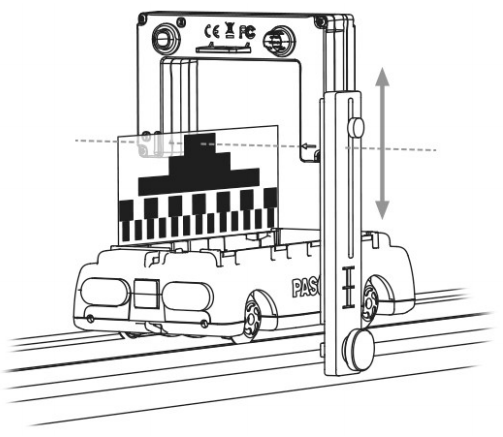
The Cart Picket Fence has three flags of different length. Adjust the height of the photogate so that the desired flag passes through the photogate beam, as shown below.
Set up the timer
- Connect the Smart Gate, Wireless Smart Gate, or one of the Photogate Heads to SPARKvue.
-
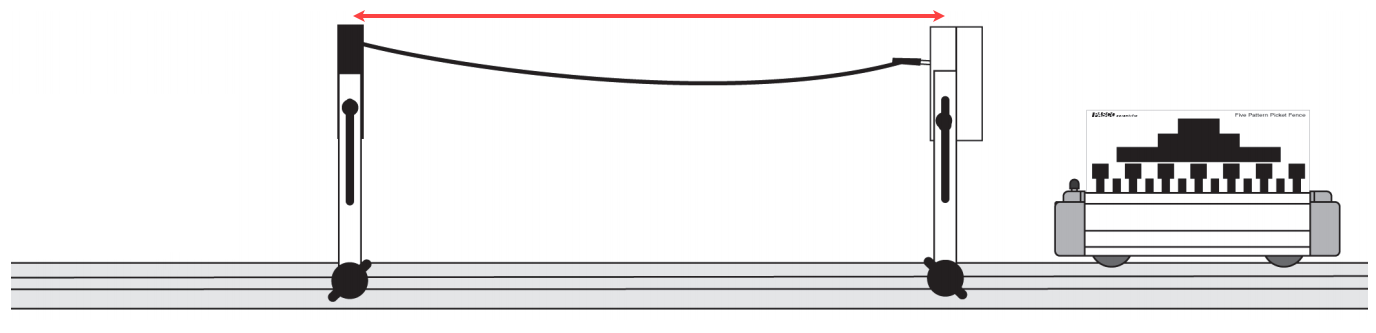
Connect the second photogate through the appropriate means:
- If your first photogate is a Smart Gate or Wireless Smart Gate, plug the digital jack of the Photogate Head into the Auxiliary Port of the Smart Gate or Wireless Smart Gate.
- If your first photogate is a Photogate Head, connect the second Photogate Head to another digital input on the same interface as the first one.
-
Under Select measurements for templates, click the Properties
 icon next to the Smart Gate or Wireless Smart Gate's name, or next to the digital interface's name if using two Photogate Heads.
 - Click Two Photogates or Smart Gate and Auxiliary Port, select Photogate Timing (Two Photogates), and click OK.
-
Enter the parameters:
-
Flag Length: Measure the length of the flag from end-to-end.

-
Photogate Spacing: This is equal to the distance between the photogate beams.
-
-
Check the boxes
 next to the measurements you want to display.
 - Select a template to display the selected measurements.
Record data
Click Start  , then allow the flag to pass through the first photogate. The software records the speed after the first photogate is blocked and then unblocked. A second speed measurement and the acceleration are recorded when the flag passes through the second photogate.