Share live data collection
Use the Shared Session feature to share live data collection with multiple devices from a single device.
Use a Shared Session to:
- Share data with students during a demonstration.
- Distribute an experiment file to multiple devices.
- Share data with all members of a lab group while one device collects the data.
Start a Shared Session
Start a Shared Session from the Welcome Screen or the Experiment Screen:
- If want to share an existing file, start the session from the Welcome Screen.
- If you want to share data from a new experiment or one in progress, start the session from the Experiment Screen.
- Click
 and select Shared Session from the menu.
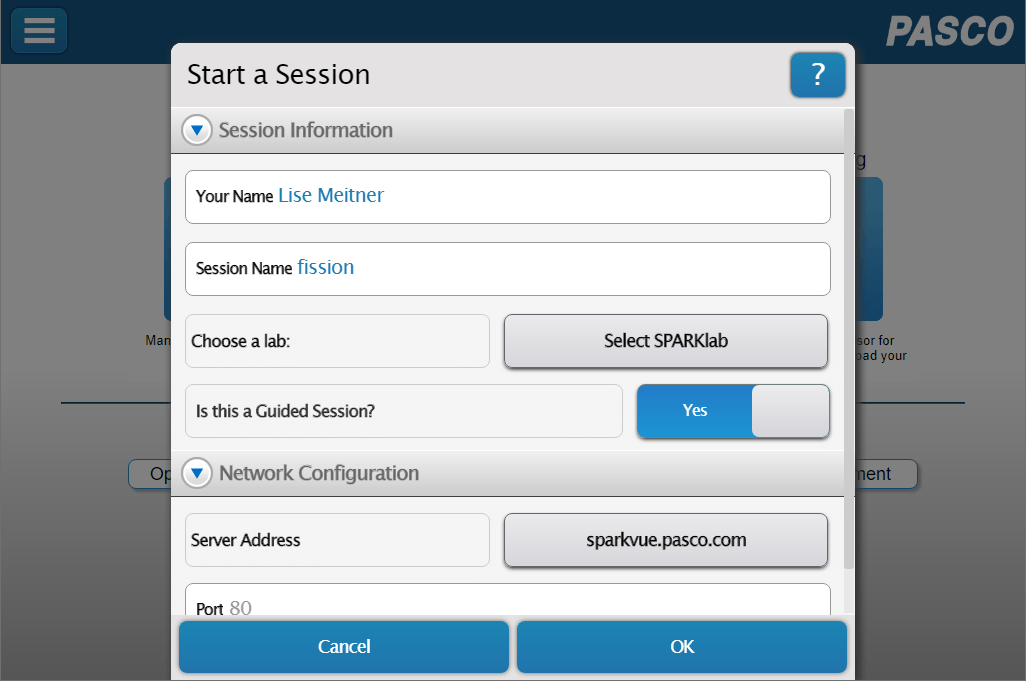
 - Click Start a Shared Session.
- Click the Your Name field and type a name for your device.
-
Click the Session Name field and type a name for the session. Use this Session Name to allow users to connect to the session.
Tip
Create a one-word, lowercase name to make it easy for others to connect. The Session Name is case sensitive.
-
(Welcome Screen only): Click Select SPARKlab, then select the file you want to use for the Shared Session.
- Toggle the switch to select whether or not this is a Guided Session.
- Select Yes to only allow your device to have control over data collection.
- Select No to allow any device to have control over data collection.
- Click OK.
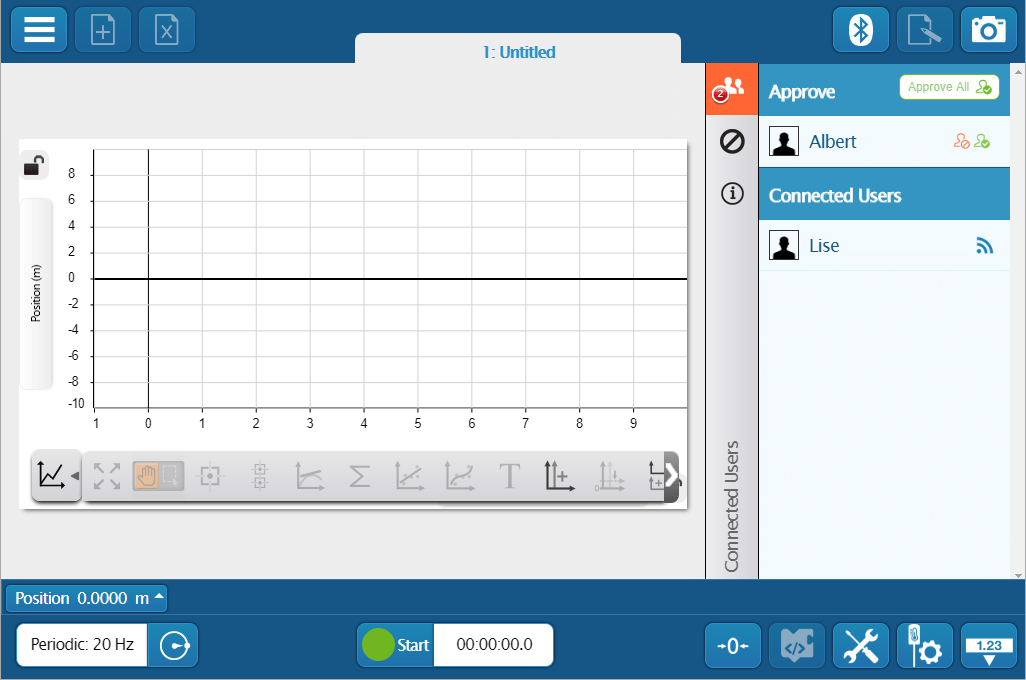
The Shared Session has begun and the Connected Users panel appears on the right side of the screen.
Connect to a Shared Session
Connect to a Shared Session started by another device.
- Click and select Shared Session from the menu.
- Click Manually connect to an opened session.
- Click the Your Name field and enter a name for your device.
- Click the Session Name field and enter the name of the session provided to you by the session host.
- Click OK.
- Wait for the session host to approve your connection.
Manage a Shared Session
After starting a Shared Session, the Connected Users panel appears on the screen, as shown below. Use the Connect Users panel to manage the Shared Session.
-
Approve
 and Reject
  Users
UsersUsers appear in the Connected Users panel when trying to connect to the shared session. You can approve or reject users on an individual basis or click
 to approve all users at once.
 -
User List

Click to show or hide the Connected Users panel.
-
Disconnect Session

Click to disconnect the Shared Session. The file and data from the session remains on the disconnected devices.
-
Session Info

Click to show the name of the Shared Session.