Calibrate a conductivity sensor
Improve the accuracy of a conductivity sensor, such as the Wireless Conductivity Sensor (PS-3210A), by calibrating the conductivity measurement.
Before you start
Calibrating a conductivity sensor will require the following components:
- Two beakers
- Two standard solutions of known conductivity
- De-ionized water
Calibration
- Connect the sensor to SPARKvue.
- Create a Graph display with Conductivity as one of the measured properties.
-
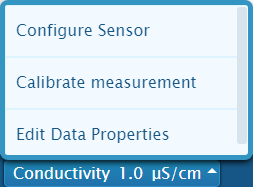
From the Live Data Bar in the bottom left of the Experiment Screen, select the Conductivity measurement and select Calibrate measurement from the list of options.
-
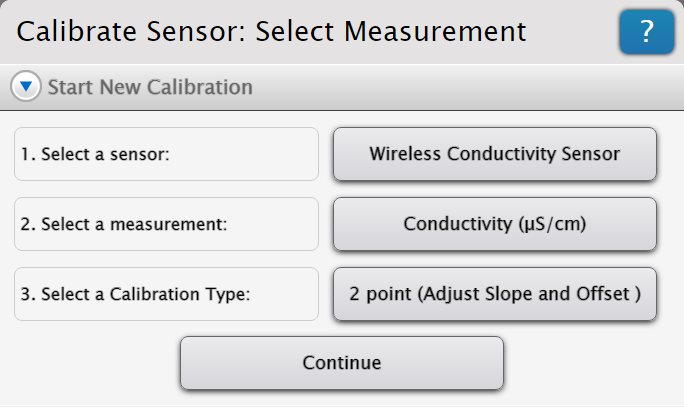
Adjust the settings to the following options, as shown in the image below. Once you have done so, select Continue.
- Sensor: {The name of the sensor being calibrated}
- Measurement: Conductivity (µS/cm)
- Calibration Type: 2 point (Adjust Slope and Offset)
-
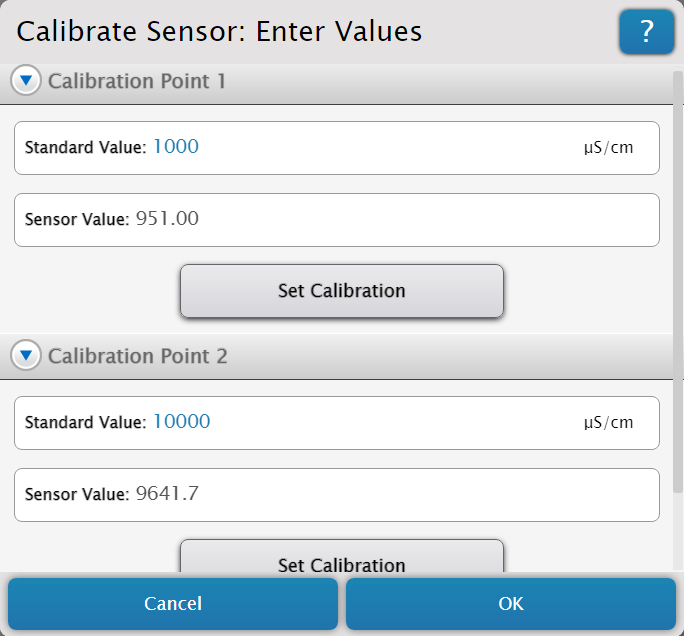
Insert the probe of the conductivity sensor into a beaker containing your first standard solution, making sure the tip is fully immersed. Wait for the Sensor Value reading under Calibration Point 1 to stabilize before proceeding.
- Under Calibration Point 1, enter the known conductivity of the first standard solution into the Standard Value box, then select Set Calibration.
- Remove the conductivity probe from the first beaker and rinse the probe with de-ionized water.
- Insert the probe into another beaker containing the second standard solution, making sure the tip is fully immersed. Wait for the Sensor Value reading under Calibration Point 2 to stabilize before proceeding.
-
Under Calibration Point 2, enter the known conductivity of the second standard solution into the Standard Value box, then select Set Calibration.
-
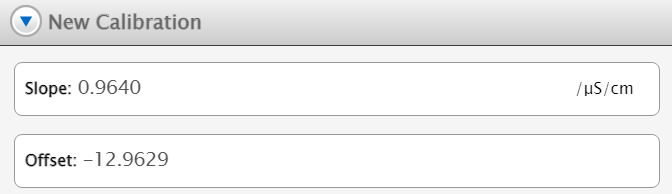
Review your new calibration to make sure it is appropriate, then select OK.